Decompose Navigation


Welcome to another series in mobile application programming, with a particular focus on the capabilities of Kotlin Multiplatform and Compose Multiplatform. In the upcoming posts, I will showcase several popular navigation libraries. Before starting a project, we often need to decide on the best approach to navigation – a quick review can help us evaluate the options and choose the right tool for our needs. First up is “Decompose,” which you might have read about in previous posts on the “Fullstack Kotlin Developer.” Later, I will also cover the libraries “Voyager,” “Apyx,” and “Compose.” The basic requirements for the test application are:
- Application should allow us to navigate from one screen to another.
- Application should allow to pass some parameters from first to second screen.
- Application should handle the screen rotation without loosing data.
- Application should handle the Tab Navigation.
- Application should handle the async operations with coroutines.
Project configuration with linear navigation
Base project setup as always is made with Kotlin Multiplatform Wizard. We also need to add some Decompose as it is the core thing that we would like to examine. There is also one thing that we need to add to the project and that is the Kotlin Serialization plugin.
libs.versions.toml

[versions]
decompose = "3.0.0-beta01"
serialization = "1.6.3"

[libraries]
decompose = { module = "com.arkivanov.decompose:decompose", version.ref = "decompose" }
decompose-compose = { module = "com.arkivanov.decompose:extensions-compose", version.ref = "decompose" }
serialization-json = { module = "org.jetbrains.kotlinx:kotlinx-serialization-json", version.ref = "serialization" }

[plugins]
kotlinSerialization = { id = "org.jetbrains.kotlin.plugin.serialization", version.ref = "kotlin" }
Freshly added dependencies needs to be synced with the project and added to the build.gradle.kts
plugins {
    alias(libs.plugins.kotlinSerialization)
}

sourceSets {
    androidMain.dependencies {
        ...
        implementation(libs.decompose)
    }
    commonMain.dependencies {
        ...
        implementation(libs.decompose)
        implementation(libs.decompose.compose)
        implementation(libs.serialization)
    }
}
Now we can sync the project and start coding. Following the Decompose documentation we can notice that the main element of the library is the Component class that encapsulates logic (and other components). Components are lifecycle-aware with their lifecycle that is automatically managed. its lifecycle is very similar to the android’s activity lifecycle. Components are independent of the UI and the UI should rely on the components. The idea is to hold as much code in the shared logic as possible. Components are responsive for holding business logic and the navigation itself (the navigation is separated from the UI). If you are familiar with Android development you can think of the components as the ViewModel.
Each component should have a ComponentContext that manages its lifecycle, keeps its state (can preserve component state during changes), and handles the back button. The context is passed through the constructor and can be added to the component by the delegation.
As mentioned above the main point of the app should be a RootComponent which should be provided with theComponentContext to determine how it should act on different platforms. Therefore, its context cannot be provided and must be created on the platform itself. For such situations, we can use the DefaultComponentContext(). If it’s created inside the Composable function we should always use the remember{} so the context will not be created with every recomposition.
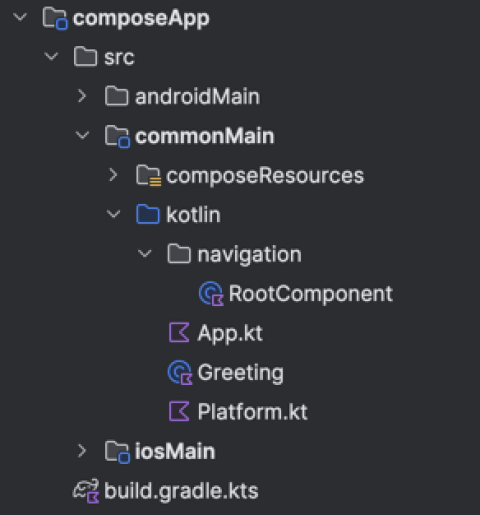
With that covered we can start to code, lets create a navigation package in our project with the RootComponent. The RootComponent will live as long as the application.
class RootComponent(
    componentContext: ComponentContext
) : ComponentContext by componentContext {
    // Some code here
}
Let’s assume that our application will hold two screens – FirstScreen and SecondScreen. Both of them will be represented by the Component class. The FirstScreen will be the first screen that will be shown to the user and the SecondScreen will be shown after the user clicks the button on the FirstScreen. To handle such a case we need to create a Stack in the RootComponent – the stack is provided to the component via the ComponentContext. Every stack requires the Configuration that needs to be @Serializable, it will represent the child components and contains all arguments needed to create it.
@Serializable
sealed class Configuration {
    @Serializable
    data object FirstScreen : Configuration()

    @Serializable
    data class SecondScreen(val text: String) : Configuration()
}
The created configuration can be used now in the stack creation. We should use the StackNavigator interface. It contains the methods needed to handle the process, such as navigate(), push(), pop() etc…
private val navigation = StackNavigation<Configuration>()The definitions of child components are created by the Configuration, but now they need also to create Child Components themselves. Components are organized as trees, where the root component is the main component and the child components are the components that are created by the main component. The parent component knows only about its direct children. Every component can be independently reused in every place in the app. With the usage of the navigation, components are automatically created and destroyed, and they need a provided component context from the parent. Let’s now focus on the Child Stack approach, but you can find other solutions in the docs.
During the navigation, the child stack compares new configurations with the previous one. There should be only one (the top) component active, others are in the back and stopped or destroyed.
class FirstScreenComponent(
    componentContext: ComponentContext
) : ComponentContext by componentContext {
    // Some code here
}

class SecondScreenComponent(
    componentContext: ComponentContext,
    private val text: String
) : ComponentContext by componentContext {
    // Some code here
}
With new components added, we now need to create them inside the root component – they should be called children.
sealed class Child {
    data class FirstScreen(val component: FirstScreenComponent) : Child()
    data class SecondScreen(val component: SecondScreenComponent) : Child()
}
The last thing to do is to create the childStack. The childStack requires some parameters to be passed, such as the source of the navigation, the serializer, the initial configuration, the handleBackButton, and the childFactory. The childFactory is a function that creates the child component based on the configuration and component context. The childStack is responsible for creating the child components and managing their lifecycle.
val childStack = childStack(
   source = navigation,
   serializer = Configuration.serializer(),
   initialConfiguration = Configuration.FirstScreen,
   handleBackButton = true,
   childFactory = ::createChild
)
private fun createChild(configuration: Configuration, componentContext: ComponentContext): Child =
when (configuration) {
is Configuration.FirstScreen -> Child.FirstScreen(FirstScreenComponent(componentContext))
is Configuration.SecondScreen -> Child.SecondScreen(SecondScreenComponent(componentContext, configuration.text))
}ChildStack cannot be empty, it has to have at least an active (resumed) child component. Components in the back are always stopped. If we want to use multiple ChildStacks in one component all of them have to have unique key associated. If we examine the childStack we can notice that it is a Value type.

The Value is a type that represents a value that can be observed as the Decompose equivalent of Jetpack Compose State, it is also independent of the approach u want to use further in the application. Nevertheless, in the Compose Multiplatform approach it can (and should) be transformed to the state.
With all things done, we can now handle the actual navigation, following the documentation we can handle it in multiple ways – with traditional callbacks or with a bit more reactive approach with flow or observable. It’s all upon to you how you want to communicate child components with the root component. You can also create a global navigation object that will be responsible for changing the screens from any place in the app, there is no good or bad practice. For the simplification of the example, I will use the callbacks.
In the firstScreen, I will add a lambda expression on onButtonClick: (String) -> Unit that will be called when the button is clicked. The lambda will be called with the greetings text, and handled in the RootComponent.
class FirstScreenComponent(
    componentContext: ComponentContext,
    private val onButtonClick: (String) -> Unit,
) : ComponentContext by componentContext {

    fun click() {
        onButtonClick("Hello from FirstScreenComponent!")
    }
}
Now I need to implement the callback and handle the navigation.
@OptIn(ExperimentalDecomposeApi::class)
private fun createChild(configuration: Configuration, componentContext: ComponentContext): Child =
    when (configuration) {
        is Configuration.FirstScreen -> {
            Child.FirstScreen(
                component = FirstScreenComponent(
                    componentContext = componentContext,
                    onButtonClick = { textFromFirstScreen ->
                        navigation.pushNew(Configuration.SecondScreen(text = textFromFirstScreen))
                    }
                )
            )
        }
            ...
    }
The Decompose gives plenty wat of starting new screens:
push(configuration)– pushes new screen to top of the stackpushNew(configuration)– pushes new screen to top of the stack, does nothing if configuration already on the top of stackpushToFront(configuration)– pushes the provided configuration to the top of the stack, removing the configuration from the back stack, if anypop()– pops the latest configuration at the top of the stack.- and more, that are described here
The same approach can be used to handle the back button, the handleBackButton parameter in the childStack is responsible for that. If the back button is pressed the childStack will pop the latest configuration from the stack.
class SecondScreenComponent(
    componentContext: ComponentContext,
    private val text: String,
    private val onBackButtonClick: () -> Unit
) : ComponentContext by componentContext {
    fun getGreeting(): String = text
    fun goBack() {
        onBackButtonClick()
    }
}
@OptIn(ExperimentalDecomposeApi::class)
private fun createChild(configuration: Configuration, componentContext: ComponentContext): Child =
when (configuration) {
...
is Configuration.SecondScreen -> Child.SecondScreen(
component = SecondScreenComponent(
componentContext = componentContext,
text = configuration.text,
onBackButtonClick = { navigation.pop() }
)
)
}The whole navigation is now completed, and it is independent of the UI, it’s pure Kotlin and in shared code, and can be unit-tested. The last thing to do is to create the UI for the screens. It will be as simple as possible, a column with texts and buttons. Each screen will be a @Composable function that takes a component as a parameter.
@Composable
fun FirstScreen(
    component: FirstScreenComponent
) {
    Column(
        modifier = Modifier.fillMaxSize(),
        horizontalAlignment = Alignment.CenterHorizontally,
        verticalArrangement = Arrangement.Center
    ) {
        Text("First screen")
        Button(onClick = { component.click() }) {
            Text("Second Screen")
        }
    }
}
@Composable
fun SecondScreen(
component: SecondScreenComponent
) {
Column(
modifier = Modifier.fillMaxSize(),
horizontalAlignment = Alignment.CenterHorizontally,
verticalArrangement = Arrangement.Center
) {
Text("First screen")
Spacer(modifier = Modifier.height(16.dp))
Text("Greetings: ${component.getGreeting()}")
Button(onClick = { component.goBack() }) {
Text("Go Back")
}
}
} The buttons are invoking functions that are provided via the components. As we remember functions will trigger the navigation in our rootComponent.
The entrypoint to our application is the App function that will take the RootComponent as a parameter and handle the navigation events from the childStack. Each platform iOS and Android will create the rootComponent and pass it to the App() function.
val childStack = rootComponent.childStack.subscribeAsState()The decompose Value can be transformed to the State by the subscribeAsState() function. To handle upcoming changes in the stack the decompose provides a special composable function called Children that takes stack as a parameter, and can be configured using standard modifiers it also can use different types of transition animations with the StackAnimation. The last parameter of the Children function is a lambda expression. That will be called with every new child on the top of the stack. This is the place where we can say how to display new components.
@Composable
fun App(rootComponent: RootComponent) {
    MaterialTheme {
        val childStack = rootComponent.childStack.subscribeAsState()
        Children(
            stack = childStack.value,
            animation = stackAnimation(slide()),
        ) { child ->
            when (val instance = child.instance) {
                is RootComponent.Child.FirstScreen ->
                    FirstScreen(instance.component)

                is RootComponent.Child.SecondScreen ->
                    SecondScreen(instance.component)
            }
        }
    }
}
The last thing to do is to create the RootComponent in the platform-specific code. Next pass it to the App()function. For Android, it will be the MainActivity located in the androidMain, and for iOS the MainViewController located in iosMain.
For Android we should use the decomposes retainedComponent() function that will create the RootComponent and retain it during the configuration changes. It also creates the componentContext.
class MainActivity : ComponentActivity() {
    @OptIn(ExperimentalDecomposeApi::class)
    override fun onCreate(savedInstanceState: Bundle?) {
        super.onCreate(savedInstanceState)

        val rootComponent = retainedComponent { componentContext ->
            RootComponent(
                componentContext = componentContext
            )
        }
        setContent {
            App(rootComponent = rootComponent)
        }
    }
}
Since the iOS entry point is a composable function we will need to create componentContext by ourselves. Thankfully decompose has the proper functions for it. I will use the DefaultComponentContext() that takes the Lifecycle as a parameter which is also created by the part of the decompose lib via the LifecycleRegistry(). To prevent creating new components on each recomposition we should remember the instantiated component.
fun MainViewController() = ComposeUIViewController {
    val rootComponent = remember {
        RootComponent(
            componentContext = DefaultComponentContext(LifecycleRegistry())
        )
    }

    App(rootComponent)
}
That’s all! We can now run the application on both Android and iOS devices and expect same behaviour!
To test it a bit more we can now add the Tab Navigation to the App. Let’s start with creating a new screen that will have its childStack and the entry point on the firstScreen. The steps that we need to do are the same as before. The only thing that will change is how to handle child creation/navigation in the new component.
class TabNavigationScreen(
    componentContext: ComponentContext
) : ComponentContext by componentContext
Tab navigation support
The TabNavigationScreen will behave in almost similar way as the RootComponent it will have its own childStack, configuration, childFactory and will be responsible for creating the child components and navigate between them.
sealed class Child {
    data class TabOne(val component: ThirdScreenComponent) : Child()
    data class TabTwo(val component: FourthScreenComponent) : Child()
}

@Serializable
sealed class Configuration {
    @Serializable
    data object TabOne : Configuration()

    @Serializable
    data object TabTwo : Configuration()
}
class ThirdScreenComponent(
componentContext: ComponentContext,
) : ComponentContext by componentContext {
val text = "Hello from ThirdScreen"
}class FourthScreenComponent(
componentContext: ComponentContext,
) : ComponentContext by componentContext {
val text = "Hello from FourthScreen"
}We need to remember that different stacks should have their unique keys.
private val navigation = StackNavigation<TabNavigationComponent.Configuration>()
val childStack = childStack(
    source = navigation,
    serializer = navigation.tab.TabNavigationComponent.Configuration.serializer(),
    initialConfiguration = navigation.tab.TabNavigationComponent.Configuration.TabOne,
    handleBackButton = true,
    childFactory = ::createChild,
    key = "TabNavigationStack"
)

@OptIn(ExperimentalDecomposeApi::class)
private fun createChild(
    configuration: TabNavigationComponent.Configuration,
    componentContext: ComponentContext
): TabNavigationComponent.Child =
    when (configuration) {
        is TabNavigationComponent.Configuration.TabOne -> {
            TabNavigationComponent.Child.TabOne(ThirdScreenComponent(componentContext))
        }

        is TabNavigationComponent.Configuration.TabTwo -> {
            TabNavigationComponent.Child.TabTwo(FourthScreenComponent(componentContext))
        }
    }
The TabNavigationComponent needs to handle tabs clicks. This will be done with bringToFront function.
fun onTabOneClick() {
    navigation.bringToFront(Configuration.TabOne)
}

fun onTabTwoClick() {
    navigation.bringToFront(Configuration.TabTwo)
}
The last thing to to in the Components is to provide a way for running the TabNavigationScreen from the FirstScreen.
class FirstScreenComponent(
    componentContext: ComponentContext,
    private val onGoToSecondScreenClick: (String) -> Unit,
    private val onGoToTabsScreen: () -> Unit,
) : ComponentContext by componentContext {

    fun newScreen() {
        onGoToSecondScreenClick("Hello from FirstScreenComponent!")
    }

    fun tabScreen() {
        onGoToTabsScreen()
    }
}
class RootComponent(...) {
private fun createChild(...) {
when (configuration) {
is Configuration.FirstScreen -> Child.FirstScreen(
component = FirstScreenComponent(
onGoToTabsScreen = {
navigation.pushNew(Configuration.TabsNavigation)
}
)
)
...
Configuration.TabsNavigation
-> Child.TabsScreen(
component = TabNavigationComponent(
componentContext = componentContext
)
)
}
}
sealed class Child {
...
data class TabsScreen(val component: TabNavigationComponent) : Child()
}
@Serializable
sealed class Configuration {
...
@Serializable
data object TabsNavigation : Configuration()
}
}The last thing is to handle the changes on the UI layer.
@Composable
fun App(...) {
    ...
    Children() { child ->
        ...
        is RootComponent.Child.TabsScreen ->
        TabsScreen(instance.component)
    }
}
@Composable
fun TabsScreen(
tabNavigationComponent: TabNavigationComponent
) {
Scaffold(
bottomBar = {
Row(
horizontalArrangement = Arrangement.Center
) {
Button(onClick = { tabNavigationComponent.onTabOneClick() }) {
Text("TAB ONE")
}
Button(onClick = { tabNavigationComponent.onTabTwoClick() }) {
Text("TAB TWO")
}
}
}
) { innerPadding ->
val childStack = tabNavigationComponent.childStack.subscribeAsState()
Column(
modifier = Modifier.padding(innerPadding),
verticalArrangement = Arrangement.Center,
horizontalAlignment = Alignment.CenterHorizontally
) {
Children(
stack = childStack.value,
animation = stackAnimation(slide()),
) { child ->
when (val instance = child.instance) {
is TabNavigationComponent.Child.TabOne ->
ThirdScreen(instance.component)
is TabNavigationComponent.Child.TabTwo ->
FourthScreen(instance.component)
}
}
}
}
}ThirdScreen and FourthScreen are the same, and simple.
@Composable
fun ThirdScreen(
    component: ThirdScreenComponent
) {
    Column(
        modifier = Modifier.fillMaxSize(),
        horizontalAlignment = Alignment.CenterHorizontally,
        verticalArrangement = Arrangement.Center
    ) {
        Text(component.text)
    }
}Coroutines support
Since every modern mobile application should be reactive and handle async operations we can use the coroutines. To do so we need to create a CoroutineScope in the component. This is not an out-of-the-box solution as in native ViewModel, but it is quite simple to handle. The Component is lifecycle aware and we can use this feature to manage the coroutines.
class ThirdScreenComponent(
    componentContext: ComponentContext,
) : ComponentContext by componentContext {
    val text = "Hello from ThirdScreen"
    val countDownText = mutableStateOf<String>("0")

    init {
        val scope = coroutineScope(Dispatchers.Default + SupervisorJob())
        scope.launch {
            for (i in 10 downTo 0) {
                countDownText.value = i.toString()
                delay(1000)
            }
        }
    }


    private fun CoroutineScope(context: CoroutineContext, lifecycle: Lifecycle): CoroutineScope {
        val scope = CoroutineScope(context)
        lifecycle.doOnDestroy(scope::cancel)
        return scope
    }

    private fun LifecycleOwner.coroutineScope(context: CoroutineContext): CoroutineScope =
        CoroutineScope(context, lifecycle)
}
Or you can use the Decompose compatibility library that provides the coroutineScope function that will handle the lifecycle for you – Essently.
[versions]
essently = "2.0.0"

[libraries]
essently - coroutines = { module = "com.arkivanov.essenty:lifecycle-coroutines", version.ref = "essently" }
commonMain.dependencies {
...
implementation(libs.essently.coroutines)
}class FourthScreenComponent(
componentContext: ComponentContext,
) : ComponentContext by componentContext {
val text = "Hello from FourthScreen"
val countDownText = mutableStateOf<String>("0")
//Essently
private val scope = coroutineScope(Dispatchers.Default + SupervisorJob())
init {
scope.launch {
for (i in 10 downTo 0) {
countDownText.value = i.toString()
delay(1000)
}
}
}
}If u want to support structured concurrency you should pass the mainContext: CoroutineContext to the component instead of using Dispatchers.Default inside it.
Quick summary
The Decompose is a powerful library that can be used to compose multiplatform applications that support Android, iOS, WEB, and Desktop. It is separated from the UI code and handled by the common shared logic. It’s pretty straightforward, easy to use, and can be customized to fit your needs. Nevertheless, it’s strongly related to the library’s internal concepts as Components that force you to design the app in a certain way and limit the possibilities. In my point of view, the biggest advantage of such an approach is the clear boundary between UI and the Navigation, the navigation is now a part of your business logic, not the way you build your views, and can be easily tested and reused.
The next compose multiplatform navigation library that I can recommend is Voyager. It is much more cooped to the Compose itself and does not focus on the shared common business logic held by its object (but it also provides a way to do things in the same way as Decompose does). I think that Voyager is a bit more flexible in terms of how the application will behave and how the navigation will look like. It is handling the navigation in the UI layer, not only in the shared code – and you need to decide which approach is better for you.
Another library for compose multiplatform navigation is Appyx which has a lot of similarities to the Voyager. It also is closely connected to compose and provides a lot of flexible features that can be used in the application. But I find myself more comfortable with the Voyager, it is more intuitive.
If you are looking for a navigation lib for your compose multiplatform project you definitely should give it a try!
If you are interested in how it works in a bit bigger application take a look at my GitHub for the GameShop application.
To sum things up, the Decompose is a great library that can be used to compose multiplatform projects, and the approach proposed by the creators of the lib suits me well. It is a great way to separate the navigation from the UI.